py-fortress implements standards-based RBAC in Python. There have been numerous postings lately here about it.
Prerequisites
Very soon we’ll have a release of py-fortress that works with just the file system. This is to lower complexity of testing and developing with this package. In the meantime, an LDAP server has to be running on the network, so follow the instructions in the quickstart below to use a Docker container, if you don’t already have one installed.
- README-QUICKSTART
- Optional, see sample package py-fortress-sample as starting point for your program.
from pyfortress import (
    # model
    User,
    Role,
    Perm,
    PermObj,
    # apis:
    review_mgr,
    admin_mgr,
    access_mgr,
    #exception handling:
    FortressError,
    global_ids
)
Access Mgr APIs – Create Session, Check Access, Session Perms
These are used to check the policies at runtime. For example, to authenticate is create_session and authorization is check_access here.
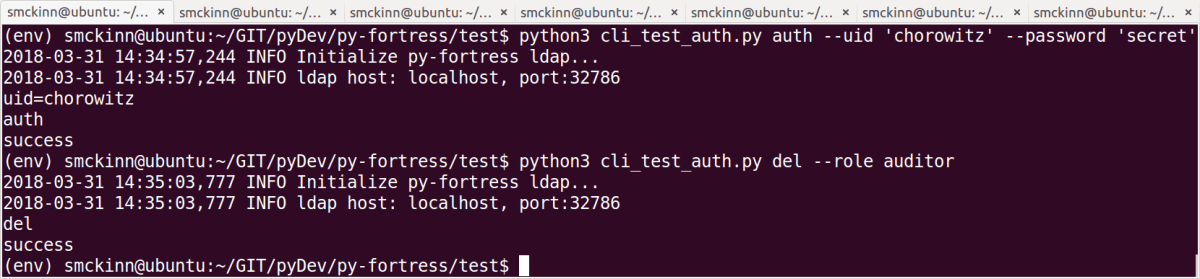
- Now test signing on the RBAC way:
def test_create_session(self):
    """
    create session
    """
    print('test_create_session')

    try:
        session = access_mgr.create_session(User(uid='foo1', password='secret'), False)
        if not session:
            print('test_create_session fail')
            self.fail('test_create_session fail')
        else:
            print('test_create_session pass')
            pass
    except FortressError as e:
        self.fail('test_create_session failed, exception=' + e.msg)
The session will then be held on to by the client for subsequent calls like check_access and session_perms
- Here’s how to check a single permission:
def test_check_access(self):
    """
    create session and check perm
    """
    print('test_check_access')

    try:
        session = ... obtained earlier
        result = access_mgr.check_access(session, Perm(obj_name='ShoppingCart', op_name='add'))
        if not result:
            print('test_check_access fail')
            self.fail('test_check_access fail')
        else:
            print('test_check_access pass')
            pass
    except FortressError as e:
        self.fail('test_check_access failed, exception=' + e.msg)
- Retrieve all of the permissions as a list:
def test_session_perms(self):
    """
    create session and get perms for user
    """
    print('test_check_access')

    try:
        session = ... obtained earlier
        perms = access_mgr.session_perms(session)
        if not perms:
            print('test_session_perms failed')
            self.fail('test_session_perms failed')

        for perm in perms:
            print_perm(perm, 'session_perms: ')
        pass
    except FortressError as e:
        self.fail('test_session_perms failed, exception=' + e.msg)
Admin and Review APIs – Create, Read, Update, Delete
These are for programs that manage and search the data. For example admin guis, conversion programs, reporting apps.
- Add a user:
def test_add_user(self):
    """
    Add a basic user
    """
    print('test_add_user')

    try:
        admin_mgr.add_user(User(uid='foo1', password='secret'))
        print('test_add_user success')
    except FortressError as e:
        self.fail('test_add_user failed, exception=' + e.msg)
- Add a role:
def test_add_role(self):
    """
    Add a basic role
    """
    print('test_add_role')
    try:
        admin_mgr.add_role(Role(name='Customer'))
        print('test_add_role success')
    except FortressError as e:
        self.fail('test_add_role failed, exception=' + e.msg)
- Add an object:
def test_add_obj(self):
    """
    Add a basic perm object
    """
    print('test_add_obj')

    try:
        admin_mgr.add_object(PermObj(obj_name='ShoppingCart'))
        print('test_add_obj success')
    except FortressError as e:
        self.fail('test_add_obj failed, exception=' + e.msg)
- Add a perm:
def test_add_perm(self):
    """
    Add a basic perm
    """
    print('test_add_perm')

    try:
        admin_mgr.add_perm(Perm(obj_name='ShoppingCart', op_name='add'))
        print('test_add_perm success')
    except FortressError as e:
        self.fail('test_add_perm failed, exception=' + e.msg)
- Assign a user:
def test_assign_user(self):
    """
    Assign a user to a role
    """
    print('test_assign_user')

    try:
        admin_mgr.assign(User(uid='foo1'), Role(name='Customer'))
        print('test_assign_user success')
    except FortressError as e:
        self.fail('test_assign_user failed, exception=' + e.msg)
- Grant a permission:
def test_grant_perm(self):
    """
    Grant a permission to a role
    """
    print('test_grant_perm')

    try:
        admin_mgr.grant(Perm(obj_name='ShoppingCart', op_name='add'), Role(name="Customer"))
        print('test_grant_perm success')
    except FortressError as e:
        self.fail('test_grant_perm failed, exception=' + e.msg)
7. Read a user:
def test_read_user(self):
    """
    Read a user that was created earlier. Expects a unique uid that points to an existing user.
    """
    print_test_name()
    try:
        out_user = review_mgr.read_user(User(uid='foo1'))
        print_user(out_user)
    except FortressError as e:
        print_exception(e)
        self.fail()
thows exception if user is not present
8. Search for users with a matching uid:
def test_search_users(self):
    """
    Search for users that match the characters passed into with wildcard appended.  Will return zero or more records, one for each user in result set.
    """
    print_test_name()
    try:
        users = review_mgr.find_users(User(uid='foo*'))
        for user in users:
            print_user(user)
    except FortressError as e:
        print_exception(e)
        self.fail()
returns a list of type user
9. Search for users assigned a role:
def test_assigned_users(self):
    """
    Search for users that are assigned a particular role.  Will return zero or more records, one for each user in result set.
    """
    print_test_name()
    try:
        uids = review_mgr.assigned_users(Role(name='Customer'))
        for uid in uids:
            print_test_msg('uid=' + uid)
    except FortressError as e:
        print_exception(e)
        self.fail()
returns a list of type string contain the user id
10. Search for users who have a permission:
def test_perm_users(self):
    """
    Search for users that have been authorized a particular permission.  Will return zero or more records, of type user, one for each user authorized that particular perm.
    """
    print_test_name()
    try:
        users = review_mgr.perm_users(Perm(obj_name='ShoppingCart', op_name='add'))
        for user in users:
            print_user(user)
    except FortressError as e:
        print_exception(e)
        self.fail()
returns a list of type user
11. Read a role:
def test_read_role(self):
    """
    The read role expects the role name to point to an existing entry and will throw an exception if not found or other error occurs.
    """
    print_test_name()
    try:
        out_role = review_mgr.read_role(Role(name='Customer'))
        print_role(out_role)
    except FortressError as e:
        print_exception(e)
        self.fail()
returns a single entity of type role
12. Search for roles matching a particular name:
def test_search_roles(self):
    """
    Search for roles that match the characters passed into with wildcard appended.  Will return zero or more records, one for each user in result set.
    """
    print_test_name()
    try:
        roles = review_mgr.find_roles(Role(name='Customer*'))
        for role in roles:
            print_role(role)
    except FortressError as e:
        print_exception(e)
        self.fail()
returns a list of type role
13. Search for roles assigned to a user:
def test_assigned_roles(self):
    """
    Return the list of roles that have been assigned a particular user.  Will return zero or more records, of type constraint, one for each role assigned to user.
    """
    print_test_name()
    try:
        constraints = review_mgr.assigned_roles(User(uid='foo1'))
        for constraint in constraints:
            print_test_msg('role name=' + constraint.name)
    except FortressError as e:
        print_exception(e)
        self.fail()
returns a list of type role_constraint
14. Search for roles who have granted a particular permission:
def test_perm_roles(self):
    """
    Return the list of roles that have granted a particular perm.  Will return zero or more records, containing the role names, one for each role assigned to permission.
    """
    print_test_name()
    try:
        names = review_mgr.perm_roles(Perm(obj_name='ShoppingCart', op_name='add'))
        for name in names:
            print_test_msg('role name=' + name)
    except FortressError as e:
        print_exception(e)
        self.fail()
returns a list of strings containing the role names
15. Read an object:
def test_read_obj(self):
    """
    The ob_name is the only required attribute on a fortress object. Will throw an exception if not found.
    """
    print_test_name()
    try:
        out_obj = review_mgr.read_object(PermObj(obj_name='ShoppingCart'))
        print_obj(out_obj)
    except FortressError as e:
        print_exception(e)
        self.fail()
return a single entity of type object
16. Search for objects matching obj_name field:
def test_search_objs(self):
    """
    Search for ojects that match the characters passed into with wildcard appended.  Will return zero or more records, one for each user in result set.
    """
    print_test_name()
    try:
        objs = review_mgr.find_objects(PermObj(obj_name='ShoppingCart*'))
        for obj in objs:
            print_obj(obj)
    except FortressError as e:
        print_exception(e)
        self.fail()
returns a list of type object
17. Read a permission entry:
def test_read_perm(self):
    """
    Permissions require obj_name and op_name, obj_id is optional.  This will throw an exception if not found.
    """
    print_test_name()
    try:
        out_perm = review_mgr.read_perm(Perm(obj_name='ShoppingCart', op_name='add'))
        print_perm(out_perm)
    except FortressError as e:
        print_exception(e)
        self.fail()
returns a single entity of type permission
18, Search for perms:
def test_search_perms(self):
    """
    Search for perms that match the characters passed into with wildcard appended.  Will return zero or more records, one for each user in result set.
    """
    print_test_name()
    try:
        perms = review_mgr.find_perms(Perm(obj_name='ShoppingCart*', op_name='*'))
        for perm in perms:
            print_perm(perm)
    except FortressError as e:
        print_exception(e)
        self.fail()
returns a list of type perm
19. Search for perms by role:
def test_role_perms(self):
    """
    Search for perms that have been granted to a particular role.  Will return zero or more records, of type permission, one for each grant.
    """
    print_test_name()
    try:
        perms = review_mgr.role_perms(Role(name='Customer'))
        for perm in perms:
            print_perm(perm)
    except FortressError as e:
        print_exception(e)
        self.fail()
returns a list of type permission
20. Search for perms by user:
def test_user_perms(self):
    """
    Search for perms that have been authorized to a particular user based on their role assignments.  Will return zero or more records, of type permission, one for each perm authorized for user.
    """
    print_test_name()
    try:
        perms = review_mgr.user_perms(User(uid='foo1'))
        for perm in perms:
            print_perm(perm)
    except FortressError as e:
        print_exception(e)
        self.fail()
returns a list of type permission